Server RAM rarely runs at its rated speed. Real-world data from Dell PowerEdge and HPE ProLiant systems shows consistent memory downclocking due to CPU and platform limits.
Most people expect RAM speed to behave like a spec sheet promise. Install DDR4-3200 and you should get 3200 MT/s. In practice, that almost never happens in enterprise servers.
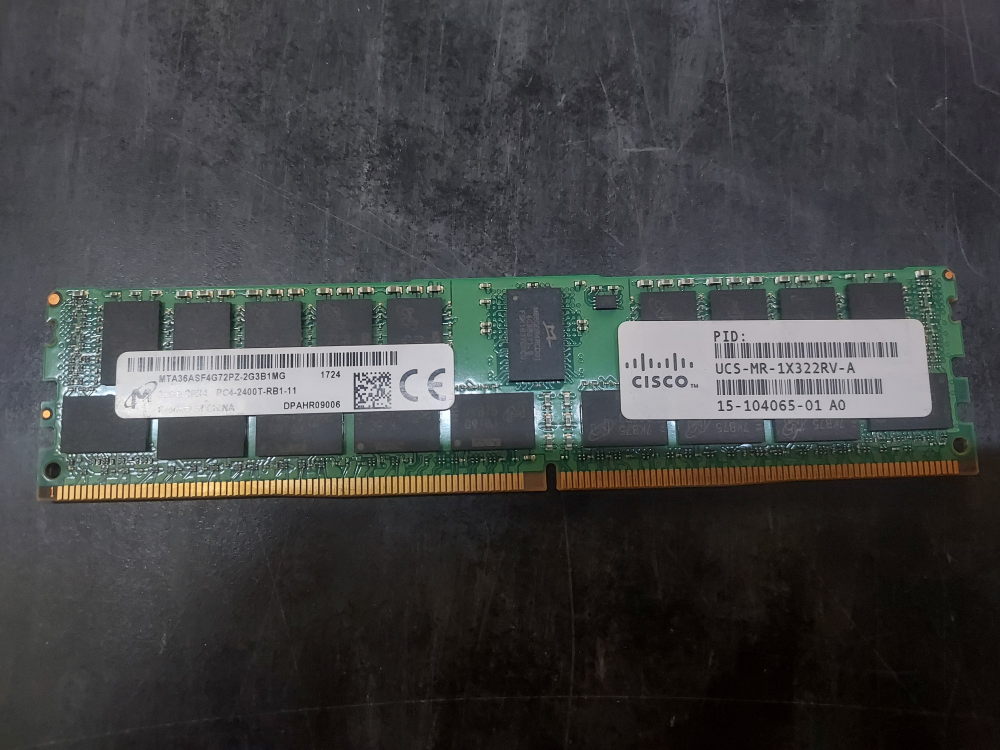
What actually matters is not the speed printed on the DIMM, but the speed the system ends up configuring at boot. That is the number you see as “Configured RAM Speed,” and it is almost always lower.
Across a dataset of Dell PowerEdge, HPE ProLiant, and related platforms, a consistent pattern appears: memory is routinely downclocked based on CPU generation, memory population rules, and platform design.
I pulled the following data from real-world server builds:
| CPU | Chassis Model | RAM Speed | Configured RAM Speed |
|---|---|---|---|
| 1 x AMD EPYC 7502 32-Core Processor | ProLiant DL325 Gen10 | 8 x 3200 MT/s | 8 x 2933 MT/s |
| 1 x Intel(R) Xeon(R) Silver 4215 CPU @ 2.50GHz | PowerEdge R640 | 6 x 2666 MT/s | 6 x 2400 MT/s |
| 2 x Intel(R) Xeon(R) Silver 4112 CPU @ 2.60GHz | PowerEdge R540 | 2 x 2666 MT/s | 2 x 2400 MT/s |
| 1 x Intel(R) Xeon(R) CPU E5-2643 v3 @ 3.40GHz | PowerEdge R430 | 1 x 2666 MT/s | 1 x 2133 MT/s |
| 2 x Intel(R) Xeon(R) Gold 6246 CPU @ 3.30GHz | PowerEdge R740 | 6 x 3200 MT/s | 6 x 2933 MT/s |
| 2 x Intel(R) Xeon(R) CPU E5-2670 v3 @ 2.30GHz | PowerEdge R730xd | 2 x 2666 MT/s | 2 x 2133 MT/s |
| 2 x Intel(R) Xeon(R) Gold 5120 CPU @ 2.20GHz | PowerEdge R440 | 8 x 2666 MT/s | 8 x 2400 MT/s |
| 2 x Intel(R) Xeon(R) CPU E5-2680 v4 @ 2.40GHz | PowerEdge R730xd | 8 x 2666 MT/s | 8 x 2400 MT/s |
| 1 x Intel(R) Xeon(R) CPU E5-2687W v3 @ 3.10GHz | ProLiant DL360 Gen9 | 2 x 2600 MT/s | 2 x 2133 MT/s |
| 2 x Intel(R) Xeon(R) Gold 6248R CPU @ 3.00GHz | PowerEdge R740xd | 12 x 3200 MT/s | 12 x 2933 MT/s |
| 2 x Intel(R) Xeon(R) Bronze 3204 CPU @ 1.90GHz | PowerEdge R740xd | 2 x 2400 MT/s | 2 x 2133 MT/s |
| 2 x Intel(R) Xeon(R) Gold 6226 CPU @ 2.70GHz | PowerFlex appliance R640 S | 12 x 3200 MT/s | 12 x 2933 MT/s |
| 2 x Intel(R) Xeon(R) Silver 4208 CPU @ 2.10GHz | ProLiant DL380 Gen10 | 2 x 2666 MT/s | 2 x 2400 MT/s |
| 1 x AMD EPYC 7281 16-Core Processor | ProLiant DL325 Gen10 | 2 x 2666 MT/s | 2 x 2400 MT/s |
| 2 x Intel(R) Xeon(R) Gold 5115 CPU @ 2.40GHz | PowerEdge R640 | 6 x 2933 MT/s | 6 x 2400 MT/s |
| 1 x Intel(R) Xeon(R) Silver 4214 CPU @ 2.20GHz | PowerEdge R740xd | 2 x 3200 MT/s | 2 x 2400 MT/s |
| 2 x AMD EPYC 7502 32-Core Processor | ProLiant DL385 Gen10 | 4 x 3200 MT/s | 4 x 2933 MT/s |
| 2 x Intel(R) Xeon(R) CPU E5-2640 v3 @ 2.60GHz | PowerEdge R630 | 4 x 2133 MT/s | 4 x 1866 MT/s |
| 2 x Intel(R) Xeon(R) CPU E5-2630L v3 @ 1.80GHz | ProLiant DL360 Gen9 | 2 x 2133 MT/s | 2 x 1866 MT/s |
| 2 x Intel(R) Xeon(R) CPU E5-2623 v3 @ 3.00GHz | PowerEdge R730xd | 2 x 2133 MT/s | 2 x 1866 MT/s |
| 2 x Intel(R) Xeon(R) CPU E5-2620 v3 @ 2.40GHz | PowerEdge R730xd | 6 x 2400 MT/s | 6 x 1866 MT/s |
| 2 x AMD EPYC 9534 64-Core Processor | PowerEdge R7625 | 4 x 5600 MT/s | 4 x 4800 MT/s |
| 1 x Intel(R) Xeon(R) CPU E5-2620 v3 @ 2.40GHz | PowerEdge R430 | 1 x 2133 MT/s | 1 x 1866 MT/s |
| 1 x Intel(R) Xeon(R) Gold 6234 CPU @ 3.30GHz | PowerEdge R440 | 2 x 2933 MT/s | 2 x 2666 MT/s |
| 1 x Intel(R) Xeon(R) Silver 4210R CPU @ 2.40GHz | PowerEdge R740xd | 2 x 2666 MT/s | 2 x 2400 MT/s |
| 4 x Intel(R) Xeon(R) CPU E7-8870 v3 @ 2.10GHz | ProLiant DL580 Gen9 | 48 x 2133 MT/s | 48 x 1600 MT/s |
| 1 x Intel(R) Xeon(R) Gold 5118 CPU @ 2.30GHz | PowerEdge R640 | 1 x 2666 MT/s | 1 x 2400 MT/s |
| 2 x Intel(R) Xeon(R) CPU E5-2630 v3 @ 2.40GHz | PowerEdge R730xd | 2 x 2133 MT/s | 2 x 1866 MT/s |
| 4 x Intel(R) Xeon(R) CPU E7-8890 v3 @ 2.50GHz | PowerEdge R930 | 24 x Unknown, 72 x 2133 MT/s | 96 x 1333 MT/s |
| 1 x Intel(R) Xeon(R) CPU E5-2650 v3 @ 2.30GHz | ProLiant DL380 Gen9 | 11 x 2133 MT/s | 11 x 1600 MT/s |
| 2 x Intel(R) Xeon(R) CPU E5-2609 v4 @ 1.70GHz | PowerEdge R730xd | 12 x 2133 MT/s | 12 x 1866 MT/s |
| 1 x Intel(R) Xeon(R) CPU E5-2660 v3 @ 2.60GHz | PowerEdge R730 | 12 x 2133 MT/s | 12 x 1866 MT/s |
| 2 x Intel(R) Xeon(R) CPU E5-2660 v4 @ 2.00GHz | PowerEdge R730 | 22 x 2133 MT/s | 22 x 1866 MT/s |
| 1 x Intel(R) Xeon(R) CPU E5-2603 v3 @ 1.60GHz | PowerEdge R530 | 1 x 2133 MT/s | 1 x 1600 MT/s |
| 2 x Intel(R) Xeon(R) Gold 5220 CPU @ 2.20GHz | ProLiant DL360 Gen10 | 1 x Unknown, 1 x 2133 MT/s | 2 x 2133 MT/s |
| 2 x Intel(R) Xeon(R) Silver 4216 CPU @ 2.10GHz | PowerEdge R440 | 2 x 2666 MT/s | 2 x 2400 MT/s |
| 1 x Intel(R) Xeon(R) Gold 6130 CPU @ 2.10GHz | R640 IDPA | 12 x 3200 MT/s | 12 x 2666 MT/s |
| 1 x Intel(R) Xeon(R) CPU E5-2603 v4 @ 1.70GHz | PowerEdge R430 | 1 x 2133 MT/s | 1 x 1866 MT/s |
| 1 x AMD EPYC 7F52 16-Core Processor | ProLiant DL325 Gen10 | 8 x 3200 MT/s | 8 x 2933 MT/s |
| 1 x Intel(R) Xeon(R) CPU E3-1280 v5 @ 3.70GHz | PowerEdge R230 | 3 x 2400 MT/s | 3 x 2133 MT/s |
| 1 x Intel(R) Xeon(R) CPU E5-2630L v3 @ 1.80GHz | PowerEdge R730xd | 2 x 2133 MT/s | 2 x 1866 MT/s |
| 1 x Intel(R) Xeon(R) CPU E5-2630 v3 @ 2.40GHz | ProLiant DL380 Gen9 | 1 x 2133 MT/s | 1 x 1866 MT/s |
| 2 x Intel(R) Xeon(R) CPU E5-2643 v3 @ 3.40GHz | PowerEdge T630 | 17 x Unknown, 7 x 2133 MT/s | 24 x 1866 MT/s |
| 1 x Intel(R) Xeon(R) CPU E3-1230 v5 @ 3.40GHz | PowerEdge R330 | 4 x 2400 MT/s | 4 x 2133 MT/s |
| 1 x Intel(R) Xeon(R) Silver 4216 CPU @ 2.10GHz | PowerEdge R640 | 1 x 3200 MT/s | 1 x 2400 MT/s |
| 1 x Intel(R) Xeon(R) Bronze 3204 CPU @ 1.90GHz | StoreEasy 1860 Storage | 1 x 3200 MT/s | 1 x 2133 MT/s |
| 2 x Intel(R) Xeon(R) Gold 6330N CPU @ 2.20GHz | PowerEdge R650 | 4 x 3200 MT/s | 4 x 2666 MT/s |
| 1 x Intel(R) Xeon(R) Silver 4208 CPU @ 2.10GHz | SYS-5019P-WTR | 2 x 2933 MT/s | 2 x 2400 MT/s |
| 4 x Intel(R) Xeon(R) Gold 6254 CPU @ 3.10GHz | PowerEdge R940 | 8 x 3200 MT/s | 8 x 2933 MT/s |
| 1 x Intel(R) Xeon(R) Gold 5120 CPU @ 2.20GHz | PowerEdge R740xd | 2 x 3200 MT/s | 2 x 2400 MT/s |
| 4 x Intel(R) Xeon(R) Gold 5115 CPU @ 2.40GHz | PowerEdge R840 | 4 x 2666 MT/s | 4 x 2400 MT/s |
| 1 x Intel(R) Xeon(R) Silver 4215R CPU @ 3.20GHz | PowerEdge R640 | 1 x 2666 MT/s | 1 x 2400 MT/s |
| 1 x Intel(R) Xeon(R) CPU E5-2609 v3 @ 1.90GHz | AIR-CT5520-K9 | 1 x 2133 MT/s | 1 x 1600 MT/s |
| 2 x Intel(R) Xeon(R) CPU E5-2603 v3 @ 1.60GHz | PowerEdge R730xd | 2 x 2133 MT/s | 2 x 1600 MT/s |
| 1 x Intel(R) Xeon(R) CPU E5-2623 v3 @ 3.00GHz | PowerEdge R530 | 1 x 2133 MT/s | 1 x 1866 MT/s |
| 2 x Intel(R) Xeon(R) Silver 4309Y CPU @ 2.80GHz | PowerEdge R650 | 4 x 2933 MT/s | 4 x 2666 MT/s |
| 1 x Intel(R) Xeon(R) Gold 5115 CPU @ 2.40GHz | PowerEdge R740xd | 1 x 2666 MT/s | 1 x 2400 MT/s |
| 2 x Intel(R) Xeon(R) CPU E5-2695 v3 @ 2.30GHz | PowerEdge R730xd | 8 x 2666 MT/s | 8 x 2133 MT/s |
| 1 x AMD EPYC 7551P 32-Core Processor | PowerEdge R6415 | 8 x 2666 MT/s | 8 x 2400 MT/s |
| 2 x Intel(R) Xeon(R) CPU E5-2637 v4 @ 3.50GHz | PowerEdge R730xd | 2 x 2666 MT/s | 2 x 2400 MT/s |
| 4 x Intel(R) Xeon(R) Platinum 8168 CPU @ 2.70GHz | PowerEdge R940 | 8 x 3200 MT/s | 8 x 2666 MT/s |
| 1 x AMD EPYC 7452 32-Core Processor | PowerEdge R7515 | 16 x 3200 MT/s | 16 x 2933 MT/s |
| 1 x Intel(R) Xeon(R) Bronze 3104 CPU @ 1.70GHz | PowerEdge R440 | 2 x 2666 MT/s | 2 x 2133 MT/s |
| 2 x Intel(R) Xeon(R) Silver 4108 CPU @ 1.80GHz | PowerEdge R640 | 8 x 2666 MT/s | 8 x 2400 MT/s |
| 1 x Intel(R) Xeon(R) Silver 4108 CPU @ 1.80GHz | PowerEdge R640 | 2 x 2666 MT/s | 2 x 2400 MT/s |
| 4 x Intel(R) Xeon(R) CPU E7-4850 v4 @ 2.10GHz | PowerEdge R930 | 8 x 2400 MT/s | 8 x 1333 MT/s |
| 2 x Intel(R) Xeon(R) CPU E5-2699 v3 @ 2.30GHz | Dell XC630-10 | 16 x 2400 MT/s | 16 x 2133 MT/s |
| 1 x Intel(R) Xeon(R) Gold 6154 CPU @ 3.00GHz | PowerEdge R740 | 2 x 2933 MT/s | 2 x 2666 MT/s |
| 2 x Intel(R) Xeon(R) CPU E5-2699A v4 @ 2.40GHz | PowerEdge R730xd | 6 x 2666 MT/s | 6 x 2400 MT/s |
| 2 x Intel(R) Xeon(R) CPU E5620 @ 2.40GHz | PowerVault NX3000 | 6 x 1333 MT/s | |
| 1 x Intel(R) Xeon(R) CPU E5-2630 v4 @ 2.20GHz | PowerEdge R430 | 1 x 2400 MT/s | 1 x 2133 MT/s |
| 1 x Intel(R) Xeon(R) CPU E5-2699 v3 @ 2.30GHz | PowerEdge R730xd | 2 x 2400 MT/s | 2 x 2133 MT/s |
| 2 x Intel(R) Xeon(R) CPU E5-2603 v4 @ 1.70GHz | PowerEdge R730 | 2 x 2400 MT/s | 2 x 1866 MT/s |
| 1 x Intel(R) Xeon(R) CPU E5620 @ 2.40GHz | ProLiant DL360 G7 | 1 x 1333 MT/s | 1 x 1066 MT/s |
| 2 x Intel(R) Xeon(R) CPU X5677 @ 3.47GHz | PowerEdge R710 | 1 x 1333 MT/s | |
| 2 x Intel(R) Xeon(R) CPU X5670 @ 2.93GHz | PowerEdge R710 | 1 x 1333 MT/s | |
| 4 x Intel(R) Xeon(R) CPU E7-4809 v4 @ 2.10GHz | PowerEdge R930 | 1 x 2400 MT/s | 1 x 1333 MT/s |
| 1 x Intel(R) Xeon(R) CPU E5-2690 v3 @ 2.60GHz | PowerEdge R730xd | 2 x 2400 MT/s | 2 x 2133 MT/s |
| 1 x Intel(R) Xeon(R) Bronze 3106 CPU @ 1.70GHz | ECSv3_R740XD | 4 x 2666 MT/s | 4 x 2133 MT/s |
| 1 x Intel(R) Xeon(R) CPU E5-2637 v3 @ 3.50GHz | PowerEdge R730xd | 1 x 2400 MT/s | 1 x 2133 MT/s |
| 4 x Intel(R) Xeon(R) Gold 5118 CPU @ 2.30GHz | PowerEdge R940 | 21 x 2666 MT/s, 3 x 2933 MT/s | 24 x 2400 MT/s |
| 1 x Intel(R) Xeon(R) Silver 4116 CPU @ 2.10GHz | PowerEdge R540 | 4 x 2666 MT/s | 4 x 2400 MT/s |
| 1 x Intel(R) Xeon(R) Silver 4112 CPU @ 2.60GHz | PowerEdge R640 | 1 x 2666 MT/s | 1 x 2400 MT/s |
| 1 x Intel(R) Xeon(R) Gold 6248 CPU @ 2.50GHz | PowerEdge R640 | 10 x 3200 MT/s | 10 x 2933 MT/s |
| 1 x Intel(R) Xeon(R) Gold 6252 CPU @ 2.10GHz | PowerEdge R640 | 10 x 3200 MT/s | 10 x 2933 MT/s |
| 1 x Intel(R) Xeon(R) E-2244G CPU @ 3.80GHz | PowerEdge T340 | 1 x 3200 MT/s | 1 x 2666 MT/s |
| 2 x Intel(R) Xeon(R) Gold 5320 CPU @ 2.20GHz | PowerEdge R650 | 8 x 3200 MT/s | 8 x 2933 MT/s |
| 2 x AMD Opteron(tm) X3216 APU | ProLiant MicroServer Gen10 | 2 x 2400 MT/s | 2 x 1600 MT/s |
| 2 x AMD Opteron(tm) Processor 6344 | AS -2022TG-HTRF | 4 x 1600 MT/s |
The most common behavior in modern systems is DDR4-3200 running at 2933 MT/s. This shows up repeatedly in platforms like the PowerEdge R740, R940, R7515, and HPE DL325 Gen10. Nothing is wrong in these cases. It simply reflects the limits of the CPU memory controller and how many DIMMs are installed per channel. The memory is capable of 3200, but the system chooses stability over maximum frequency.
A step down from that, DDR4-2666 frequently runs at 2400 MT/s across midrange servers such as the PowerEdge R640, R540, R440, and HPE DL380 Gen10. This is one of the most common real-world configurations in enterprise environments. It typically occurs when CPUs are not top-bin models or when memory channels are not evenly populated. Again, the system is not failing to perform; it is following architectural constraints.
Older Xeon platforms show even more reduction. DDR4-2133 often runs at 1866 or 1600 MT/s in systems like the PowerEdge R730 series and HPE Gen9 platforms. At this point, the limiting factor is the memory controller architecture itself rather than configuration choices. These platforms were designed for lower baseline memory speeds, and the behavior is expected.
Even newer technologies follow the same pattern. DDR5-5600, for example, can run at 4800 MT/s in systems like the PowerEdge R7625. The absolute numbers are higher, but the relationship between rated speed and configured speed remains unchanged.
What this data consistently shows is that memory speed is not a fixed property. It is negotiated at boot time between the CPU, the motherboard, and the installed DIMM configuration. The CPU memory controller sets the upper limit, and population rules can reduce it further when multiple DIMMs are installed per channel or when configurations are mixed.
From a practical standpoint, this matters because it changes how memory upgrades should be interpreted. Adding faster RAM does not guarantee higher performance. In many cases, adding more capacity can even reduce memory frequency. Likewise, two systems with identical DIMMs can run at different speeds depending on CPU generation and slot population.
The takeaway is straightforward. RAM speed on the label describes capability, not reality. Configured RAM speed is the real operating condition, and across enterprise servers it is almost always lower than the advertised specification. This is not a defect or misconfiguration in most cases—it is simply how server memory architectures are designed to behave.